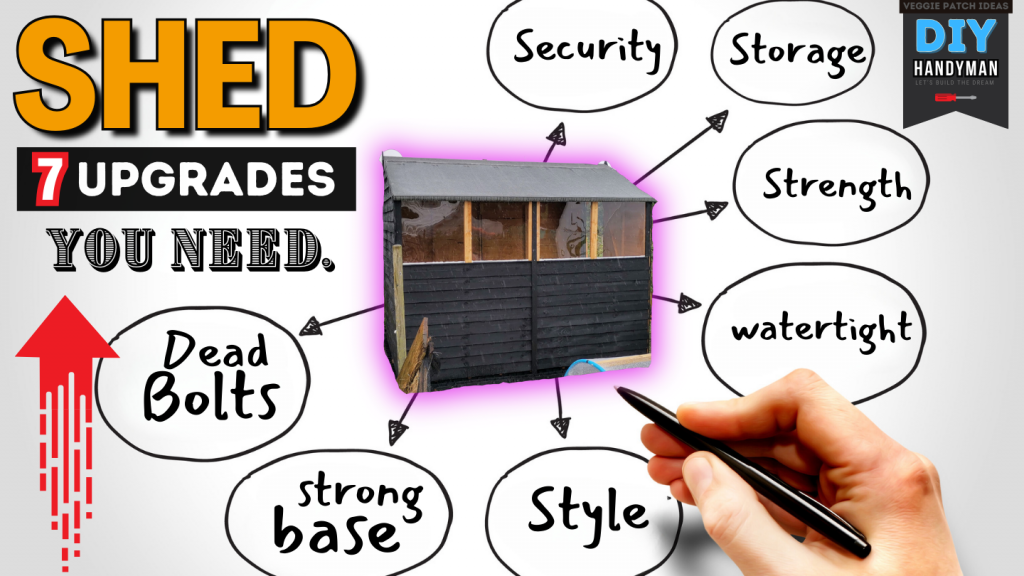
We’re diving into some incredible upgrades for your shed that will take it from drab to fab. Whether you use your shed for storage, as a workshop, or even as a cosy retreat, these tips and tricks will help you maximize space, functionality, and style. Upgrading your shed can extend the life by years if you do it correctly. Here are seven shed upgrades to think about.
Watch our YouTube video on “7 Upgrades for your Shed”
✅ Click here to watch our Shed upgrade video
Contents
1: Upgraded Shed Dead Bolts
Buy dead bolts form Amazon UK https://amzn.to/48V7Gvf
Upgrades for your shed: Deadbolts are commonly used on doors to provide extra security as upgrades for your shed, and you can also install them on shed doors to enhance security. Here are some key points to consider when using deadbolts on shed doors:
- Door Material: Ensure that the shed door is made of sturdy material, such as solid wood or metal, to properly support a deadbolt installation. Lightweight or flimsy doors may not provide the necessary strength.
- Proper Installation: Deadbolts should be installed correctly to maximize their effectiveness. It’s best to hire a professional locksmith or carpenter if you’re unsure about the installation process.
- Keyed Deadbolts: Consider using a keyed deadbolt for extra security. This means you’ll need a key to lock and unlock the deadbolt. If you’re worried about losing keys, consider having a spare set and keeping them in a safe place.
- Single-Cylinder vs. Double-Cylinder: There are two main types of deadbolts: single-cylinder and double-cylinder. Single-cylinder deadbolts can be locked and unlocked from the inside with a thumbturn, while double-cylinder deadbolts require a key to lock or unlock from both sides. Double-cylinder deadbolts provide added security but can pose a safety risk if you need to quickly exit the shed in an emergency.
- Security Strike Plate: To further strengthen the door frame, consider using a security strike plate. This reinforces the area where the deadbolt goes into the door frame, making it more resistant to forced entry.
- Use High-Quality Deadbolts: Invest in high-quality deadbolts from reputable manufacturers. They should meet industry standards for security and durability.
- Maintenance: Regularly maintain your deadbolt to ensure it functions properly. Lubricate it as needed and replace it if it becomes damaged or worn.
- Consider Additional Security Measures: Deadbolts are one part of shed security. You may also want to install motion-activated lighting, security cameras, or an alarm system to further deter potential intruders.
- Local Regulations: Be aware of any local regulations or building codes related to shed security. Some areas may have specific requirements for outbuildings like sheds.
- Assess Your Needs: The level of security you need for your shed may vary depending on what you store inside. If you store valuable equipment or items, you might want to invest in more robust security measures.
Remember that no security measure is foolproof, but a deadbolt can significantly increase the security of your shed. It’s essential to assess your specific needs and budget when deciding on the level of security for your shed.
2: Shed slide bolts
Buy slide Bolts from Amazon UK https://amzn.to/46Yzihi
Upgrades for your shed: Shed slide bolts, also known as slide bolt locks or barrel bolts, are simple yet effective locking mechanisms commonly used on shed doors, gates, and other applications. These devices consist of a sliding bolt (often cylindrical or rectangular) that can be moved into a corresponding slot or strike plate to secure a door or gate in a closed position. These can make great upgrades for your shed,
Key characteristics and considerations regarding shed slide bolts can be summarized in 300 words:
1. Simple Design: Shed slide bolts are known for their simplicity. They consist of a bolt, typically operated by manually sliding it into or out of a slot or strike plate. This design makes them easy to install and use.
2. Versatile Use: Slide bolts are versatile and can be used on various types of doors, including wooden, metal, and even some plastic shed doors. They are also suitable for use on gates and other entry points.
3. Security: While not as robust as deadbolts, slide bolts provide an additional layer of security for your shed. They are effective at preventing casual or unauthorized access.
4. Types: Slide bolts come in various types and sizes, allowing you to choose the one that best suits your shed’s door design and your security requirements. Some common variants include surface-mounted, flush-mounted, and heavy-duty slide bolts.
5. Installation: Installing a shed slide bolt is a relatively straightforward process. It typically involves attaching one part of the bolt to the door or gate and the other part (the strike plate) to the shed frame or adjacent surface. It’s essential to ensure proper alignment for the bolt to engage securely.
6. Locking Options: Slide bolts come in both lockable and non-lockable versions. Lockable slide bolts provide the option to secure the bolt in place with a padlock, offering enhanced security.
7. Durability: To ensure long-lasting security, select slide bolts made from durable materials like stainless steel or solid brass, as they are resistant to corrosion and wear.
8. Accessibility: It’s crucial to consider how easily the slide bolt can be accessed and operated from both the inside and outside of the shed. Accessibility may affect its usability, especially in emergencies.
In conclusion, shed slide bolts are a cost-effective and reliable choice for enhancing the security of your shed or outdoor storage space. They are easy to install, offer basic security, and come in various designs to suit your specific needs. When combined with other security measures, such as proper lighting and good quality locks, slide bolts can help protect your shed and its contents from unauthorized access.
3: Plastic Shed Base
Buy Plastic shed base from Amazon UK https://amzn.to/46JqyMk
✅ How to fit a shed base: WATCH THE FULL VIDEO TUTORIAL HERE
Upgrades for your shed: A plastic shed base, often made from recycled materials, offers several benefits when it comes to installing and maintaining sheds, garden storage, or other outdoor structures. Easy to use upgrades for your shed.
- Durability: Plastic shed bases are made from sturdy, weather-resistant materials that are designed to withstand the elements, ensuring a long lifespan for your shed or storage unit.
- Ease of Installation: These bases are typically easy to assemble and require minimal tools or expertise. They often come with interlocking panels or grids that can be quickly laid down on a prepared surface.
- Stability: Plastic shed bases provide a stable and level foundation for your shed. This stability prevents issues like sinking or uneven settling, which can occur with traditional methods like concrete or gravel.
- Improved Drainage: The design of plastic bases allows for efficient drainage, preventing water from pooling under or around your shed. This helps protect your shed’s floor and contents from moisture damage.
- Ventilation: Some plastic bases feature an integrated ventilation system that allows air to circulate beneath the shed. This ventilation helps to prevent mold and mildew growth.
- Eco-Friendly: Many plastic shed bases are made from recycled materials, making them an environmentally responsible choice. They reduce the need for concrete or gravel, which can have a higher environmental impact.
- Cost-Effective: Plastic bases are often more cost-effective than traditional alternatives like concrete. They also eliminate the need for ongoing maintenance.
- Versatility: These bases are adaptable to various ground types and can be used with sheds, greenhouses, playhouses, or other outdoor structures.
- Easy Maintenance: Plastic shed bases are low-maintenance. They don’t require periodic upkeep, like re-leveling or re-pouring, as is often needed with concrete bases.
- Reusability: If you decide to relocate your shed or make changes to your outdoor layout, plastic shed bases are easy to disassemble and reuse in a new location.
In summary, a plastic shed base offers a durable, stable, and environmentally friendly foundation for outdoor structures. Its ease of installation, efficient drainage, and cost-effectiveness make it a practical choice for those seeking a hassle-free and long-lasting solution to support their sheds and other outdoor storage needs.
4: Liquid membrane for sheds (upgrades)
Buy Liquid Membrane from Amazon UK https://amzn.to/46FGy1G
Upgrades for your shed: Using a liquid membrane on wood is a common practice in various construction and renovation projects to provide waterproofing, protection, and sealing for wooden surfaces. Liquid membranes are flexible, seamless coatings that can be applied to a variety of substrates, including wood. Here are some key points to consider when using a liquid membrane on wood:
- Surface Preparation: Proper surface preparation is essential. The wood surface should be clean, dry, and free from any loose or flaking material. Sanding and priming may be necessary to create a smooth, uniform surface for the liquid membrane.
- Type of Liquid Membrane: There are different types of liquid membranes available, such as acrylic-based, polyurethane-based, or epoxy-based membranes. The choice depends on your specific application and the level of protection needed.
- Application Method: Liquid membranes can be applied using a brush, roller, or spray, depending on the product and the size of the project. Follow the manufacturer’s instructions for the correct application method and thickness.
- Multiple Coats: Depending on the product and your requirements, you may need to apply multiple coats to achieve the desired level of protection. Allow each coat to dry or cure fully before applying the next one.
- Seams and Joints: Pay special attention to seams, joints, and areas where different wood pieces meet. Apply additional coats or reinforcing fabric to ensure a watertight seal in these areas.
- Curing Time: Allow the liquid membrane to cure according to the manufacturer’s recommendations. This may involve air curing or using a curing agent or catalyst, depending on the product.
- Compatibility: Ensure that the liquid membrane you choose is compatible with wood. Some products may not adhere well to certain types of wood, so it’s important to select the appropriate membrane.
- Maintenance: Regular maintenance, such as inspections and reapplication of the membrane as needed, will help extend its lifespan and maintain its effectiveness.
- UV Protection: If the wood surface will be exposed to sunlight, consider using a liquid membrane with UV protection to prevent degradation and discoloration.
- Environmental Considerations: Some liquid membranes may have environmental impact considerations, so be mindful of the product’s composition and any local regulations or guidelines.
Liquid membranes can be used on wooden decks, sheds, roofs, exterior walls, and other wooden surfaces to provide waterproofing, weatherproofing, and protection against moisture. They are a valuable tool for extending the life of wooden structures and preventing damage from exposure to the elements. Always follow the manufacturer’s recommendations and guidelines for the specific product you are using to achieve the best results.
5: Seal the gaps in your shed
Upgrades for your shed: Sealing the gaps in a shed is crucial to protect your shed’s contents from moisture, pests, and drafts. Here’s a concise guide on how to accomplish this in 200 words:
- Assessment: Begin by inspecting your shed for gaps. Common trouble spots include around doors, windows, seams in the siding, vents, and gaps where the shed meets the ground or foundation.
- Materials: Gather the necessary materials, including exterior-grade caulk, weatherstripping, insulation, foam sealant, hardware cloth (mesh), threshold strips, and, if needed, exterior trim.
- Caulk and Seal: Use caulk to seal gaps around doors, windows, and siding joints. Apply a continuous bead of caulk, smoothing it with a tool or your finger. Wipe away excess caulk with a damp cloth.
- Weatherstripping: Install self-adhesive weatherstripping around doors to prevent drafts. Ensure a snug fit to create a tight seal.
- Insulation: Fill larger gaps or voids in the walls or ceiling with expanding foam insulation. Use batt or roll insulation for more substantial spaces.
- Vent Covers: Use hardware cloth or mesh screens to cover vents and openings, preventing pests from entering while maintaining ventilation.
- Thresholds: Install door thresholds at the base of entry doors to seal the gap between the door and the floor.
- Exterior Trim: Add exterior trim around doors and windows to cover any gaps and create a finished look. Caulk the gaps between the trim and the shed.
- Foundation Sealing: Seal the gap between the shed and the foundation or base using an appropriate sealant or mortar.
- Regular Maintenance: Periodically inspect and reseal any new gaps that may develop, as weather and settling can affect the seal over time.
Properly sealing gaps in your shed helps protect your belongings from the elements and pests while improving insulation and structural integrity. It’s a cost-effective way to enhance the longevity and functionality of your shed.
6: Add extra roof supports
Upgrades for your shed: Adding extra braces to a shed roof can provide additional structural support, which is especially important in areas prone to high winds, heavy snow loads, or for larger sheds where additional reinforcement is needed. Here’s how to go about it:
- Assessment: Start by assessing your shed’s existing roof structure to identify the areas that may need additional bracing. Focus on the trusses or rafters that support the roof.
- Materials and Tools: Gather the necessary materials, which typically include lumber for the braces, nails or screws, a saw, a level, measuring tape, and a ladder or scaffolding for safety.
- Design and Placement: Determine where you want to add the braces. Typically, braces are added in a triangular pattern, connecting the top of a rafter or truss to a point along the bottom chord (horizontal beam). The exact placement depends on the specific design of your shed.
- Measure and Cut: Measure the length of the brace you need to add and cut the lumber to the appropriate size. Make sure the cuts are precise to ensure a snug fit.
- Attach Braces: Use nails or screws to attach one end of the brace to the rafter or truss and the other end to the bottom chord. Ensure that the brace is securely fastened and level. Repeat this process for all additional braces.
- Symmetry: Maintain symmetry in your bracing pattern for balance and equal load distribution.
- Safety: Always work safely. Use proper safety equipment, and be cautious when working on ladders or elevated surfaces. If you are unsure about the structural requirements or installation, consider consulting with a structural engineer or a professional contractor.
- Inspect and Reinforce: Regularly inspect your shed’s roof to check for any signs of damage or shifting. Make any necessary repairs or adjustments as needed.
Adding extra braces to a shed roof can help distribute the load more evenly, reduce the risk of sagging, and improve the overall stability and durability of the structure. When in doubt, it’s wise to consult a structural engineer or a professional contractor to ensure that the bracing is properly designed and installed for your specific shed.
7: Upgrade the Shed Hinges
Upgrades for your shed: Adding heavy-duty shed hinges is an excellent way to enhance the security and durability of your shed’s doors. Heavy-duty hinges are designed to withstand more weight and provide better support. Here’s how to add heavy-duty shed hinges for increased security:
- Assessment: Begin by evaluating your shed’s current hinge situation. Look for signs of wear, rust, or any damage to the existing hinges.
- Gather Materials and Tools: Collect the necessary materials, which include heavy-duty hinges (often made of steel or solid brass), screws or bolts, a screwdriver or drill, a level, measuring tape, a pencil, and safety equipment.
- Select Heavy-Duty Hinges: Choose heavy-duty hinges designed to support the weight and size of your shed doors. Consider the material and finish of the hinges, as well as whether they come with non-removable hinge pins for added security.
- Remove Old Hinges: Unscrew or unbolt the old hinges from the shed door and frame. Ensure you remove all screws and brackets and be careful not to damage the wood.
- Prepare the Door: Depending on the size and positioning of the new hinges, you may need to adjust or reposition the hinge cutouts on the door to accommodate the heavy-duty hinges. Use a chisel or router to do this.
- Position New Hinges: Align and position the new heavy-duty hinges on the door and frame. Use a level to ensure they are straight and properly aligned. Mark the locations of the screw holes with a pencil.
- Install New Hinges: Attach the new heavy-duty hinges using the appropriate screws or bolts. Ensure the screws are fully tightened, and the hinge leaves are flush with the door and frame.
- Test Operation: Test the door’s operation to make sure it swings smoothly and aligns properly with the frame. Adjust the hinges if necessary.
- Security Enhancement: For added security, consider installing security hinges with non-removable hinge pins. These make it more difficult for intruders to remove the door by removing the hinge pin.
- Additional Security Measures: In addition to heavy-duty hinges, consider implementing other security measures such as deadbolts, strong locks, motion-activated lighting, and security cameras to further enhance the security of your shed.
- Regular Maintenance: Periodically inspect and maintain the heavy-duty hinges by lubricating them to prevent rust and ensure smooth operation.
Upgrading to heavy-duty shed hinges is a practical and cost-effective way to reinforce the security and longevity of your shed doors. It can help deter potential intruders and ensure the doors remain strong and reliable over time. Thanks for reading “Upgrades for your shed:”
What Next?
👇🏼 Let me Guide you through the season “NEWSLETTER” ✅ Always know what to sow and when, your full guide to the growing season. (Monthly Newsletter) Simple easy to follow (No Fluff, Spam or filler) just good advice. https://veggiepatchideas.substack.com/
✅ Helpful links
Take a look at my Amazon store front for guides and product reviews of the things that you need.
RHS: facts about grow your own Click here
Just starting your veggie patch? Start here with our beginners guide
Problems on the allotment? Remove Couch Grass or Remove Bindweed
Looking for an allotment in the UK? Try searching here first GOV.UK
The national allotment society Click Here
Other sites we love Gardeners world

